One of the more interesting technological developments I've been following in the past year has been 3D printing. The promise of this technology is to allow normal people to produce complex and useful items at home, preventing the numerous costs and logistical issues associated with traditional manufacturing. And in my brief experiment with 3D printing thus-far, the technology appears to be taking great leaps forward towards this vision, and the prospect of being able to print your very own tools and art both greatly excites and interests me.
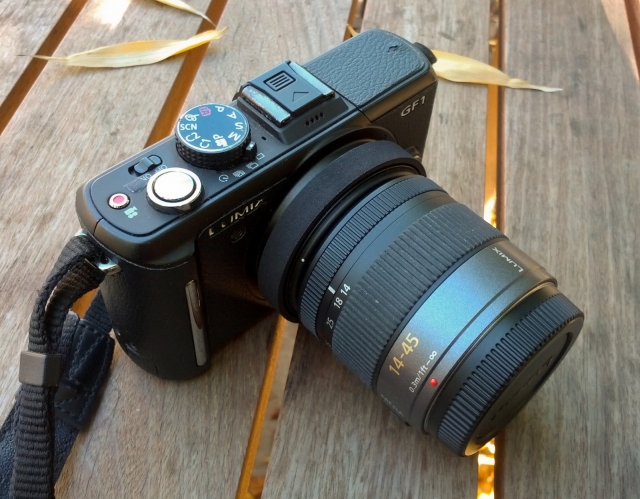
My first experiment with 3D printing was something I had in my mind for a while. My primary camera is the Panasonic GF-1, which is quite fantastic for a number of reasons, except for the fact that Micro Four Thirds (MFT) lenses are generally much, much more expensive than their Four Thirds counterparts (namely supply/demand). For example, the cost of a MFT macro lens can easily fall north of $500 – which is too expensive when I only take the occasional shot. I had also previously stumbled upon how to create a make-shift macro lens using the properties of an inverted lens (which works by focusing items at a distant focal length onto the camera's sensor) by simply flipping the lens around. However, the inverted lens does not fit into the threads on the camera body and is difficult to hold stable, which results in poor image quality. Any sort of shaking and movement is a problem, especially considering how shallow the depth of field is when you invert the lens (for my 14-45mm zoom lens, likely at the native aperture of f3.5) and how little light there is when you are up close to the object you are shooting.
Having previously bought a make-shift pinhole camera lens for my camera, I also knew that it was possible for a non-official lens adapter to be inserted into the body. And using that as a starting point, I began construction of a similar adapter which would have threads to bind the camera and the inverted lens (via the threads normally used for the lens hood).
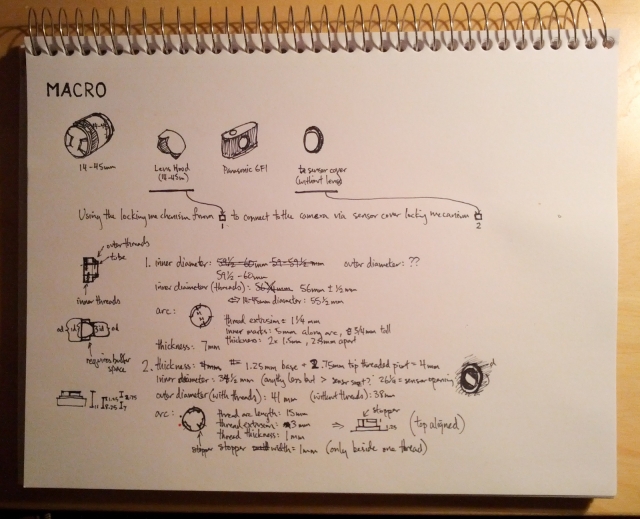
Concept design of the inverted lens adapter including various dimensions
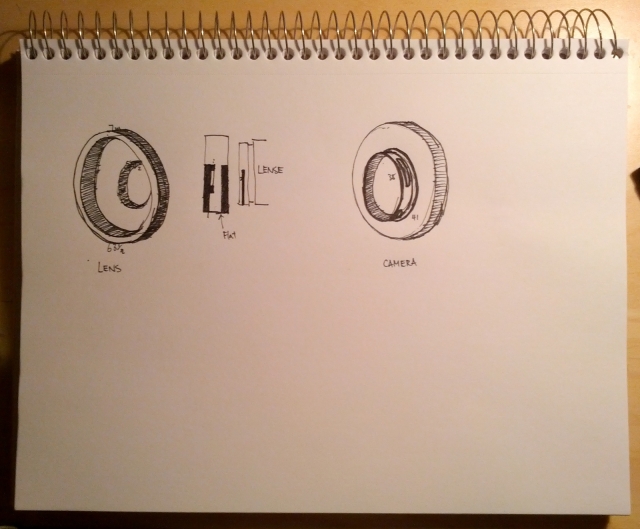
Look of the adapter from the front and back
What made this a great starter project was the fact that the design was relatively simple, which meant it was easy to create a 3D model. And after a few short hours in Maya, aside from some small issues with dimension conversion (I accidentally uploaded the object at 0.6cm vs 6cm the first time), it was soon on its way to Shapeways' 3D printers.
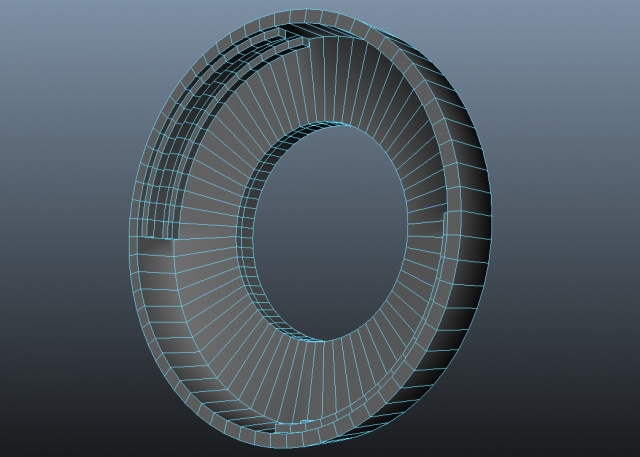
Model of the adapter in Maya
A couple of weeks later, my model finally arrived in my mailbox in a smaller, more unassuming box than I imagined. The Strong & Flexible Plastic material looked rough to the touch, and although it felt rather weak due to its feathery weight, putting it to real world use proved that it was about as sturdy a construction as I needed it to be. Unfortunately, it was also at this point that I noticed that I had made a fundamental flaw in the design! In my haste to get this to the printers, I failed to notice one small piece on the camera – a push-pin on the base of the lens frame that when pressed, triggers the internal electronics to expect a proper lens to be attached. In particular, when this push-pin is depressed, it allows the camera to take pictures while there is no actual lens attached, and since this part of my adapter was solid, it kept the push-pin pressed, preventing the camera from being able to take any pictures at all.
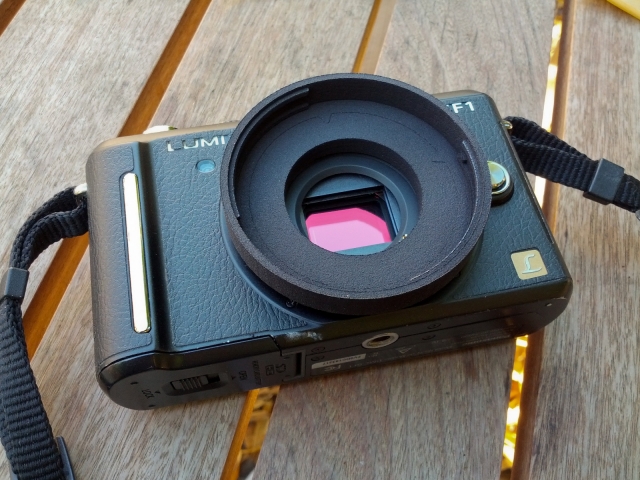
Picture of the adapter on the camera (sans lens)
Luckily, I was able to borrow a power drill in relatively short order from Adam and make a hole for the pin – a process that both confirmed the sturdiness of the construction and also revealed the white plastic resin under the outer black surface.
And with the lens attached (noticed how the lens is attached backwards)
With everything constructed, it was now possible to take some pictures!

Close up of the drill bit that saved my design :)
More macro pictures will be uploaded to the in the gallery.
Overall, despite current limitations in the types of materials that can be printed, the precision of the printers, and the whole process of having to model your object, everything came out better than I had hoped or expected. 3D printing appears to be a very promising technology, and the prospect of being able to personalize my tools to solve my specific problems is fascinating and exciting.
I am looking forward to making more stuff!
